
Flatheads are among the easiest and cheapest DIY earphones to make — but if you’re planning to get serious about it, don’t expect it to stay simple and cheap. Honestly, that’s yet another rabbit hole you’ll probably tumble into. I don’t know anyone who made one set and stopped there… There are so many different speaker drivers, shells, and cables out there, all begging to be tried… But sometimes we do things simply because they make us happy, right?
Useful DIY resources
Despite flatheads being a niche within a niche, there are some wonderful information resources to start your learning yourney. The best of them is the DIY Earbuds thread on Head-fi forums, which has been pretty active lately. Many friendly folks from all over the world are sharing their knowledge there, so this is probably the best starting point indeed.
There’s also a DIY section on the Flathead Sanctuary’s Discord server. If you are interested, you may join by clicking on the invite link here.
If you don’t have any experience in soldering, the practical soldering guide by honorable Head-fi member mt877 has proven to be very helpful for beginners, including myself. mt877 also publicly shared many simple earbud builds, which I highly recommend starting from.
Another resource worth mentioning – a wiki-style website maintained by another DIYer flathead enthusiast: flathead.wikidot.com. Wiki contains compiled information on DIY guides, drivers, shells and other DIY materials.
How difficult is it?
Making your own earbuds is pretty simple — you only need a few basic tools and parts, and most of them are easy to find on AliExpress or Alibaba. You can often get them even cheaper on Chinese marketplaces like Taobao, Tmall, or JD.com. Since these platforms aren’t directly accessible to most overseas buyers, I’ve published a separate guide on how to purchase from them using an agent like Superbuy. This will help you save a lot on drivers, shells, cables, and tuning materials.
If we simplify everything, the process looks like this: we solder the wires to the driver, mount it into the shell, and then tune the sound using various methods. You can even skip the last part if you like the sound as it is.

While the assembly is nothing too difficult, the tuning is the trickiest part there. An earbud’s sound signature depends not only on the driver’s own characteristics, but also on the conditions in which that particular driver performs best. It’s crucial how much we let the driver ‘breathe’, how much pressure we create in the shell. So it’s not just the shell volume, shape and material that matter, but also the size of the vent holes, their placement, and the density of the damping materials we apply to the shells and the drivers. Everything matters! With a single pair of drivers and different venting options, we can create dozens or even hundreds of different tuning variations.
Recommended DIY Tools&Supplies
To get you started, you don’t need much – a temperature-adjustable soldering iron, some lead-free solder wire with flux (soldering paste), tweezers, double-sided or painter’s masking tape, and some sharp manicure scissors. However, having some extra tools will make the DIY process easier.
1. Soldering station
Complete soldering kit consisting of fast-heating temperature controllable soldering iron with tons of useful accessories such as various tips, tweezers, brass wire for cleaning the soldering tip, and flexible helping hands with illuminated magnifying glass.
2. Portable mini vice with multi-angle fixture
Comes very handy when soldering – keeps your speaker drivers stable at a desired angle. I prefer this method over using some double-sided tape or painters’ masking tape for sticking the drivers to the table.
3. Pen-type Digital Multimeter
This is a cheap fully automatic multimeter which will be helpful with matching the polarity of the leads or checking the resistance of the drivers. You will definitely need one when dealing with drivers dead on arrival. I find the pen-type multimeters more comfortable to use.

4. Miniature Precision Bench Drill
Quiet and vibration-free jewelry-grade drilling machine. Ideal for small precision jobs. Combined with a mini vice this would make a perfect tool for drilling clean microscopic ventilation holes in the earbud shells. For best precision, I recommend choosing the ER11 3.175mm collet option.


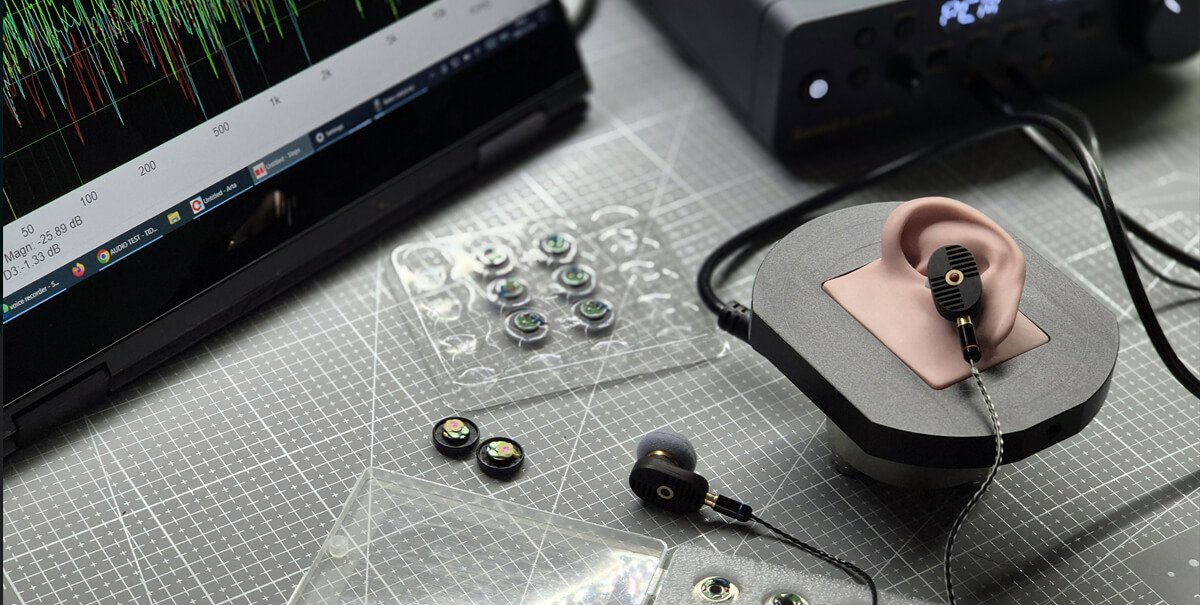
5. Artificial Ear
This is a device for testing the frequency response curve. It consists of a microphone and an ear coupler simulating the ear canal. It will help to spot the changes in your tuning which is quite a challenging task doing it by ear. The more expensive ones have silicone human-like ears (Gras KB501X clone), that fit any flathead, IEM or TWS earphones very easily.


6. Flexible glue
Once you are done with the tuning, the faceplate should be carefully glued to the shell to seal and firmly keep the faceplate in place but still make it possible to dissasemble if needed in the future. It is advised to avoid using CA glue (superglue) at all costs because it is said that fumes of cyanoacrylate may destroy the membrane of the speaker. Better use Zhanlida GS, B7000 or T7000 glue. Zhanlida GS and E7000 are both transparent but B7000 is a bit thinner. T7000 is thicker and black in color.


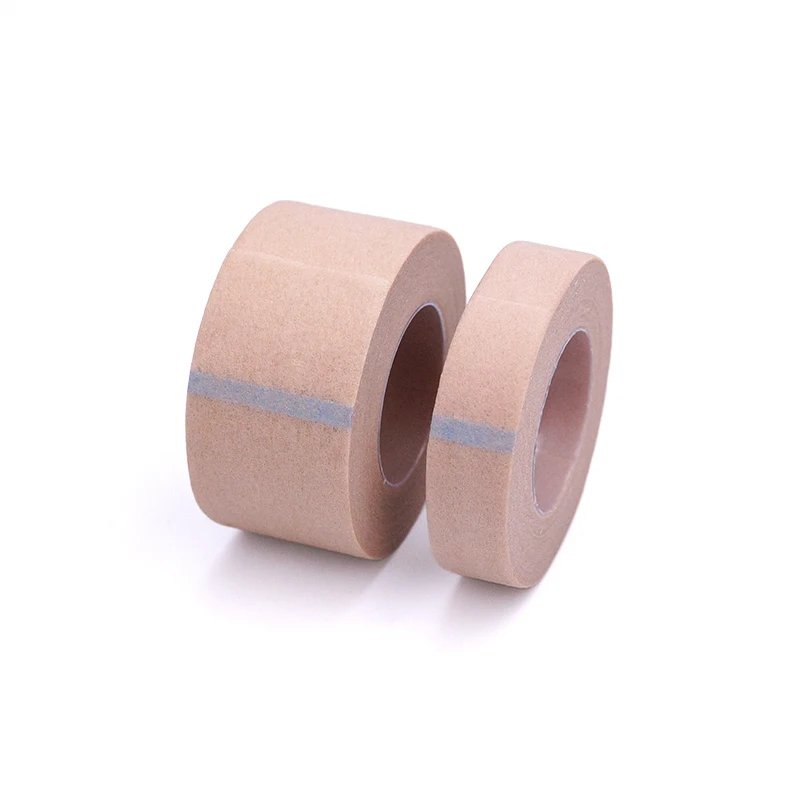
7. Breathable micropore tape
This tape is useful in at least two situations: you can use it to partially cover the vent holes to fine-tune the driver’s venting. Also, wrapping thin strips around the faceplate helps keep it intact while you test different tuning options before permanently gluing it to the shell.

Stay connected